How to Size a Small House Solar Setup
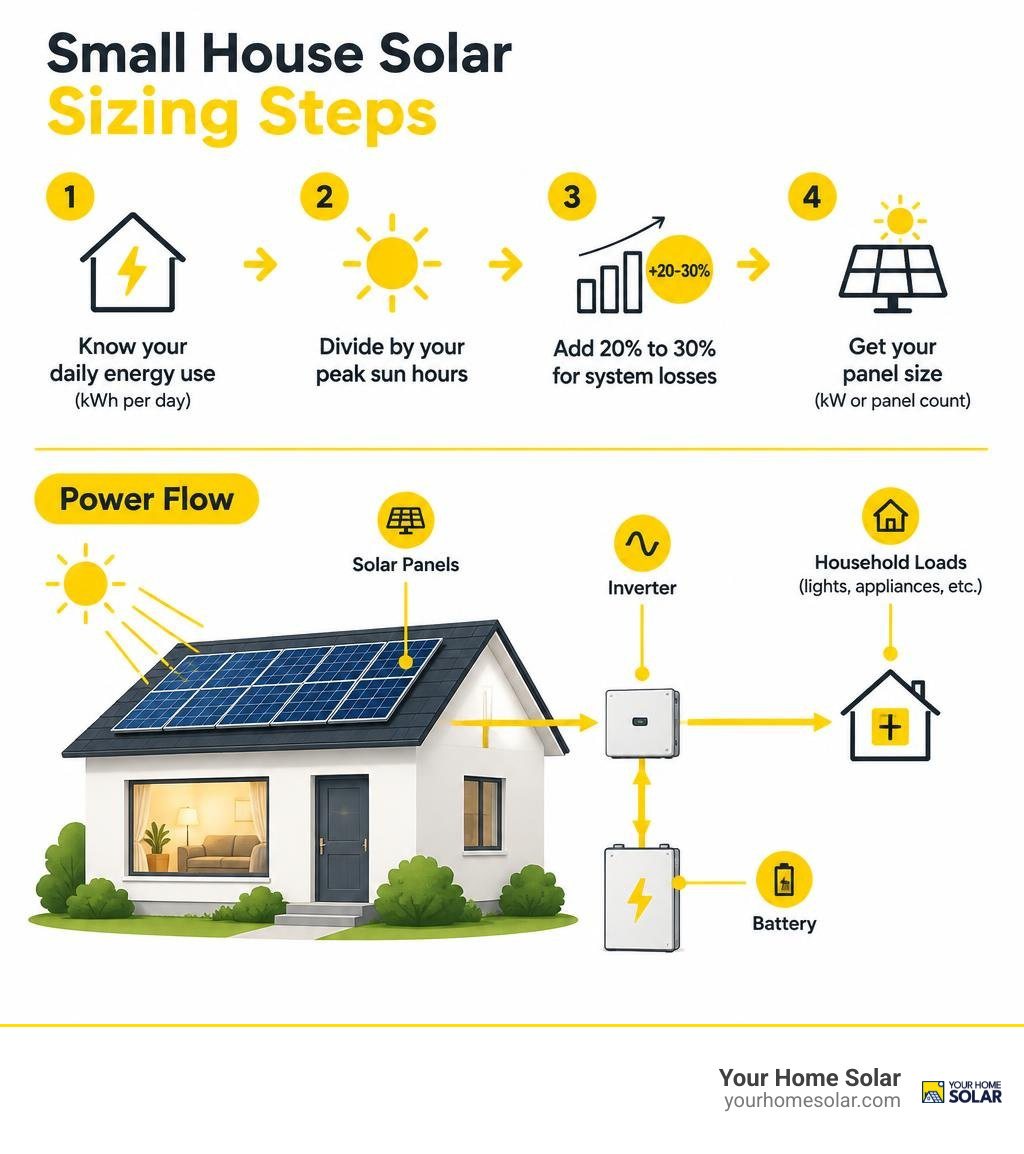
To size a small house solar setup, start with how many kilowatt-hours (kWh) you use each day. Divide that by your local peak sun hours, then add about 20% to 30% for system losses. For example, a home using 4 kWh a day with four peak sun hours needs roughly 1.3 kW of panels, or four 400-watt panels. If you want power during an outage, plan for a battery and a backup-capable inverter. Grid-tied panels alone usually shut off when the grid goes down.
I’m Ernie Bussell, founder of Your Home Solar. Since 2020, I’ve worked in solar operations in East Tennessee, and I’ll show you how to match a small house solar setup to your energy use, roof, and backup needs.
Terms related to small house solar setup:
Designing Your Small House Solar Setup: Sizing and Space Requirements
Building an effective system begins with an honest energy audit. Because small homes, cabins, and accessory dwellings have limited roof space, you cannot afford to guess your energy consumption. Sizing errors leave you sitting in the dark during cloudy stretches or overspending on hardware that physically will not fit on your roof.
To determine your needs, list every appliance you plan to run, noting its rated wattage and expected operating hours per day. Multiply watts by daily run hours to calculate watt-hours (Wh). For instance, a compact 12V DC refrigerator might draw 45 watts and run for 10 hours a day (accounting for duty cycles), consuming 450 Wh daily. Adding four 10W LED fixtures run for 5 hours yields another 200 Wh. Phone chargers, a laptop, and a water pump might consume an additional 550 Wh, bringing your total baseline daily usage to 1,200 Wh (or 1.2 kWh).
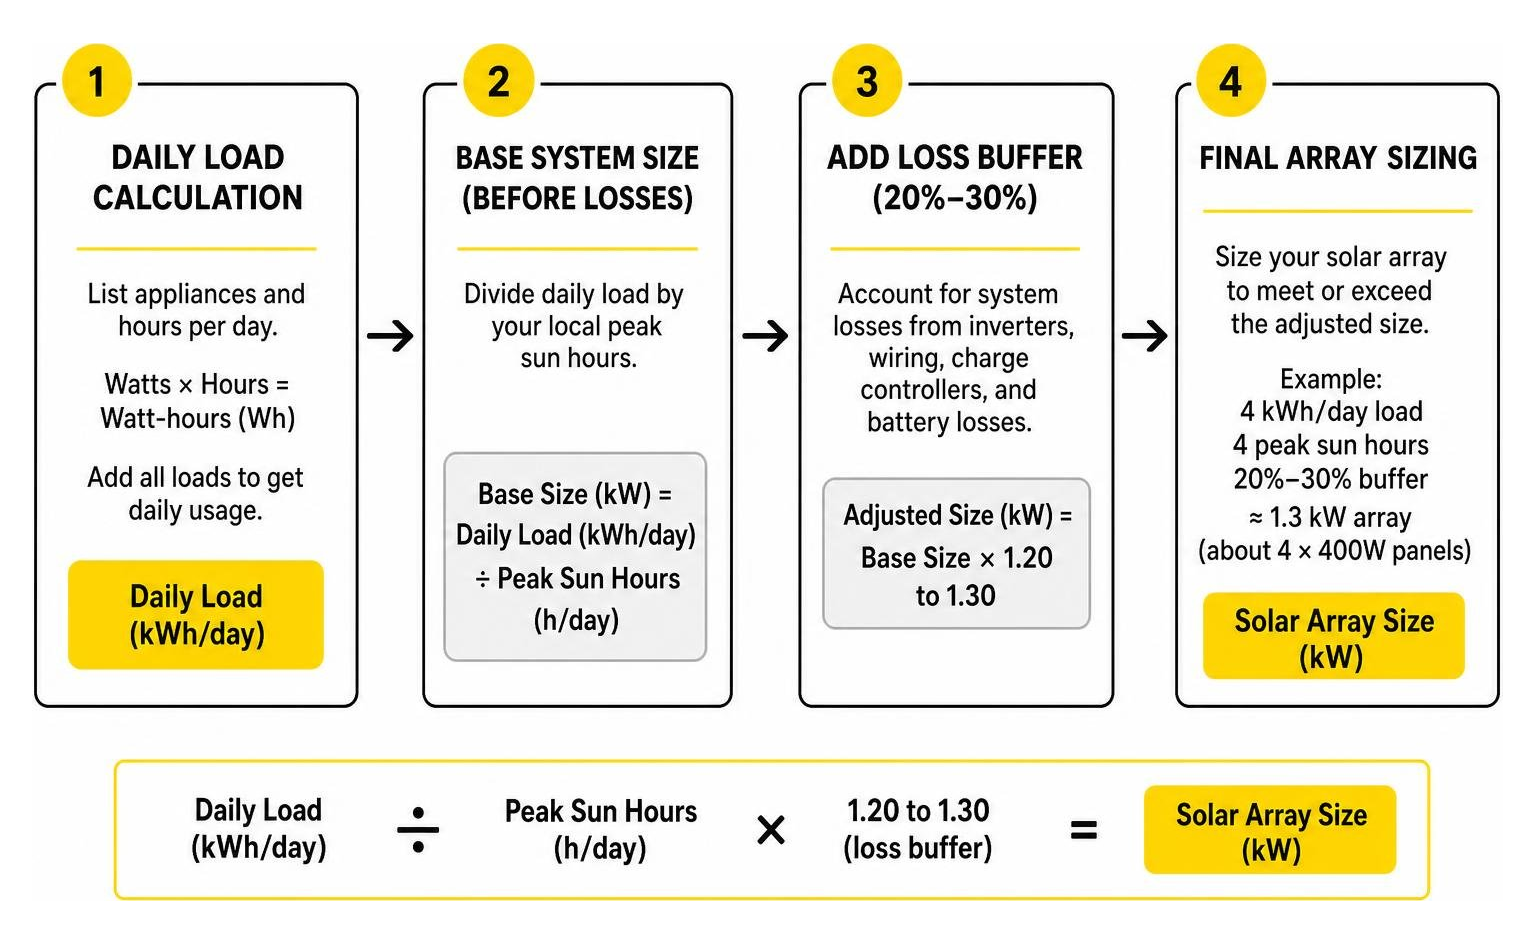
Always apply a 20% to 30% system loss buffer when calculating solar generation. Inverters, wiring runs, charge controllers, and battery chemical conversions encounter minor resistance and parasitic draw. If your daily load is 3.5 kWh, planning for roughly 4.5 kWh of actual daily generation ensures your battery bank reaches full absorption even during overcast periods.
For homeowners calculating their exact utility offset, check our guide on designing your own solar panel system or use an online tool to calculate small home solar savings based on regional sunlight hours.
Sizing the Panel Array: How Many Watts Do You Need?
Compact living demands high-density power generation. We recommend modern monocrystalline photovoltaic modules with at least 21% cell efficiency. Standard residential 400-watt monocrystalline panels deliver the highest output per square foot, making them the gold standard for compact residential roofs.
A typical modest home using 300 to 500 kWh per month requires between 6 and 12 modern 400W panels (a 2.4 kW to 4.8 kW array). Conversely, an energy-efficient weekend cabin or off-grid tiny home consuming 3 to 5 kWh daily operates smoothly on a 1 kW to 3 kW array (3 to 7 panels).
| System Size | 400W Panel Count | Usable Roof Area Required | Est. Daily Output (4 Peak Sun Hours) | Best Suited For |
|---|---|---|---|---|
| 1.2 kW | 3 Panels | 65–75 sq ft | 3.8–4.2 kWh | Basic lighting, small DC fridge, electronics, water pump |
| 2.4 kW | 6 Panels | 130–150 sq ft | 7.6–8.5 kWh | Modest cabin with TV, induction cooktop, laptop workstations |
| 3.2 kW | 8 Panels | 175–200 sq ft | 10.2–11.5 kWh | Tiny home with mini-split AC/heating and residential fridge |
| 4.8 kW | 12 Panels | 260–300 sq ft | 15.3–17.0 kWh | Full-time small house with washer, mini-split, and heavy daily loads |
Assessing Roof Constraints: Space, Pitch, Orientation, and Shading
Standard 400W residential solar modules measure approximately 6.5 feet by 3.5 feet (around 22.75 square feet per panel). However, when planning your roof layout, you must account for hardware racking gaps, flashing profiles, and local building code setbacks. Plan for roughly 25 square feet of clear roof surface per panel. A 6-panel setup needs about 150 square feet of unobstructed space.
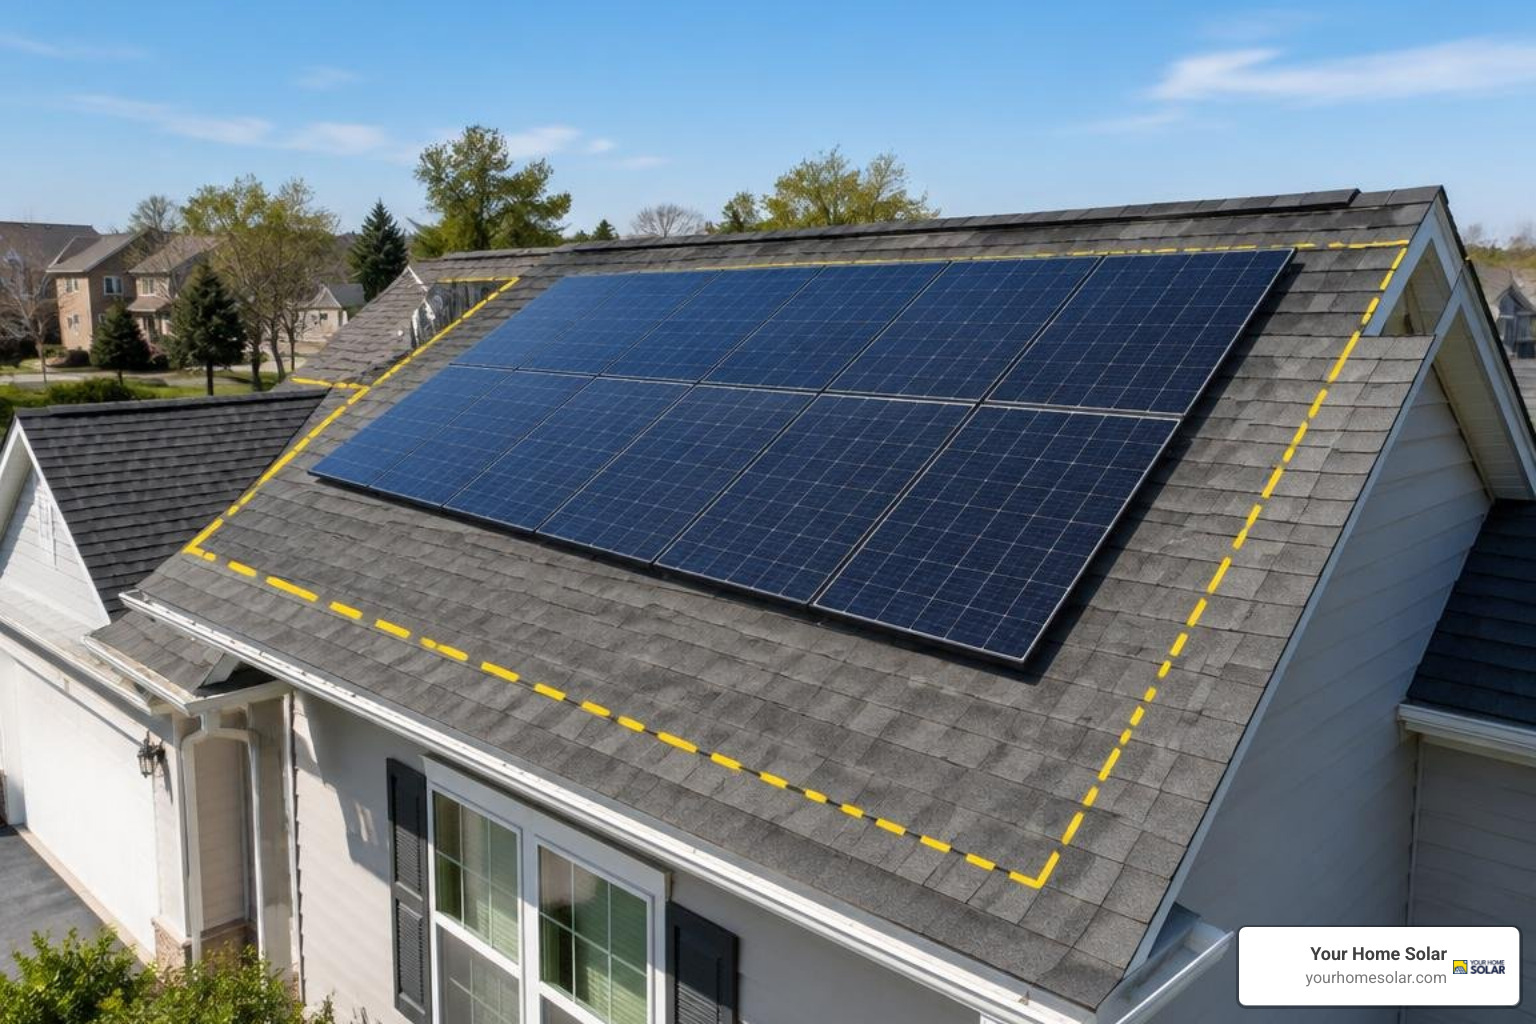
Optimal panel performance requires a clear line of sight to the sun:
- Orientation (Azimuth): In the Northern Hemisphere, south-facing roofs deliver maximum daily energy capture. Southeast- and southwest-facing arrays produce slightly less total energy (around 10% to 15% lower) but capture earlier morning or later afternoon rays.
- Pitch & Tilt: For year-round stationary installations across East Tennessee and similar latitudes, a roof pitch between 30 and 40 degrees yields optimal annual output.
- Shading & Obstructions: Even minor tree shading across a single solar cell can drastically diminish a traditional string array’s output. If vents, chimneys, or trees cast shadows on your roof, pair your array with microinverters or DC power optimizers with bypass diodes.
If your roof faces north, has heavy tree cover, or lacks structural load-bearing capacity, a ground-mounted solar array is an excellent alternative that allows you to hand-tune orientation and pitch for 10% to 15% higher seasonal yields.
Essential Hardware: Panels, Inverters, and Energy Storage
Every reliable solar power system depends on hardware synchronization. The electricity generated by your roof must be gathered, stored, and adapted to run standard household appliances.
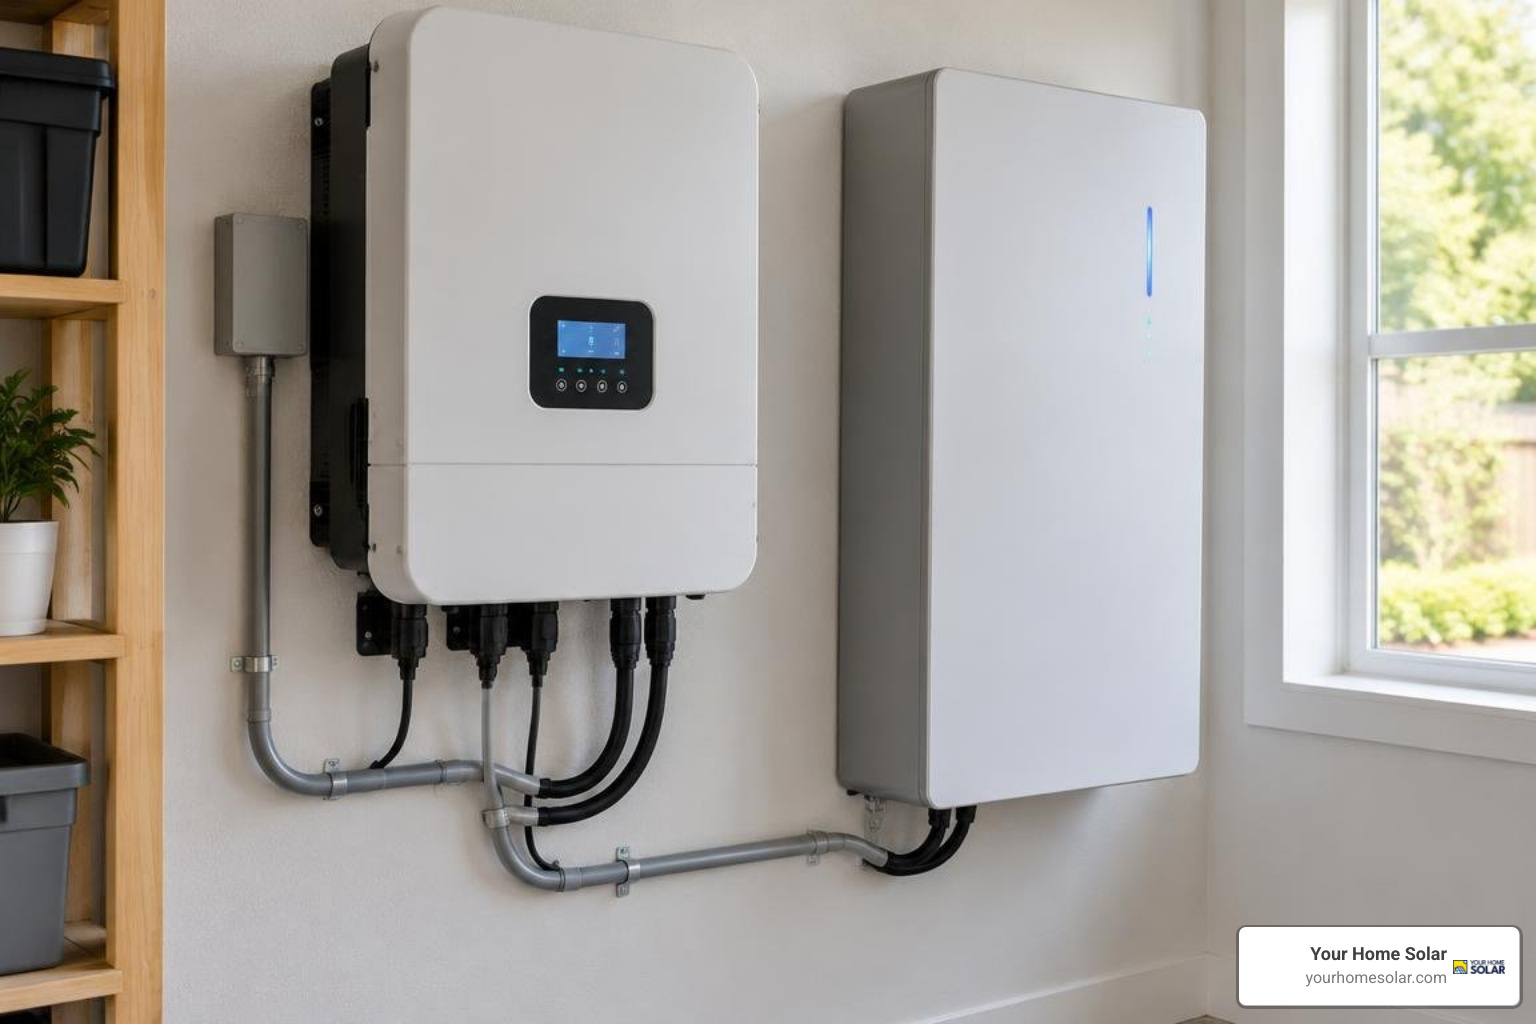
A modern, streamlined installation uses an all-in-one hybrid inverter/charger. These units combine an MPPT (Maximum Power Point Tracking) solar charge controller, a pure sine wave inverter, and a multi-stage AC battery charger into a single compact chassis. A pure sine wave output is vital; modified sine wave inverters cause micro-stutters, excess heat, and premature motor failure in appliances like refrigerators, mini-splits, and laptop power bricks. Explore our overview on understanding home inverters to see how these units handle load demands.
Core Components for a Small House Solar Setup
A safe, self-contained small house electrical system consists of four primary hardware tiers:
- PV Modules: High-efficiency monocrystalline panels wired in series or parallel strings.
- MPPT Charge Controller: Automatically sweeps panel voltage and current to deliver maximum charging power to the battery bank regardless of temperature shifts.
- Safety Disconnects: Dedicated DC circuit breakers and rapid-shutdown disconnect switches between the solar array, the charge controller, and the battery.
- Distribution Subpanel: Standard AC breaker panel that distributes 120V (or 240V split-phase) circuits to your household outlets and lighting.
Battery Chemistry Comparison: LiFePO4 vs. Lead-Acid
Energy storage choices come down to lithium iron phosphate (LiFePO4) versus traditional sealed lead-acid (AGM or Gel) batteries. While deep-cycle lead-acid golf cart batteries provided an affordable entry point in past decades, modern LiFePO4 chemistry has become the clear standard for small home living.
LiFePO4 batteries allow an 80% to 90% usable depth of discharge (DoD) without damaging cell chemistry, compared to just 50% for lead-acid. Additionally, lithium batteries are non-gassing, do not require vented battery boxes, weigh 60% less, and deliver over 3,500 charging cycles.
| Feature / Metric | Lithium Iron Phosphate (LiFePO4) | Sealed Lead-Acid (AGM / Gel) |
|---|---|---|
| Usable Depth of Discharge (DoD) | 80%–90% | 50% |
| Cycle Life (to 80% Capacity) | 3,500–6,000 cycles (10–15+ years) | 500–1,000 cycles (3–5 years) |
| Weight per Usable kWh | Approx. 20–25 lbs | Approx. 65–80 lbs |
| Venting Requirements | None (sealed, zero off-gassing) | Vented box required for safety |
| Cold Weather Charging | Requires low-temp cut-off or heating pads (<32°F) | Charges in cold, but loses effective capacity |
| Upfront Cost per Nominal kWh | Higher initial cost ($250–$400/kWh) | Lower initial cost ($140–$200/kWh) |
| Lifetime Cost per Usable kWh | Exceptionally low ($0.08–$0.12/kWh) | High due to replacements ($0.25–$0.40/kWh) |
Electrical Architecture: Choosing System Voltage for Your Small House Solar Setup
One of the most consequential decisions when designing a solar setup is choosing between a 12-volt, 24-volt, or 48-volt DC battery architecture.
Watts equal volts multiplied by amps. If you run a 2,400-watt load:
- At 12 Volts, your system pulls 200 Amps.
- At 24 Volts, your system pulls 100 Amps.
- At 48 Volts, your system pulls 50 Amps.
Lower amperage means you can run thinner, less expensive copper conductors while minimizing voltage drop and heat buildup.
- 12V Systems: Suitable only for very small, single-room cabins or mobile setups running under 1,000 watts of total panel capacity.
- 24V Systems: A practical middle ground for small workshops or modest weekend cabins running up to 2,000 watts of inverter output.
- 48V Systems: The gold standard for modern small homes and tiny houses. A 48V architecture supports 3,000W to 6,000W hybrid inverters, runs heavy household appliances like mini-split heat pumps without overheating, and maximizes equipment conversion efficiency.
Step-by-Step Installation, Wiring, and Safety Considerations
Installing solar hardware requires strict adherence to electrical safety and local building codes. If you are completing parts of the assembly, reference our step-by-step guide to solar PV system installation to ensure proper component ordering.
For permanent residential structures in East Tennessee—including Knox, Blount, Sevier, and Anderson counties—installations must adhere to National Electrical Code (NEC) Article 690 guidelines. Grid-tied installations require licensed electrician sign-offs and utility interconnection approvals from providers like TVA and local power distributors.
Wiring Safety and Overcurrent Protection
Direct current (DC) arcs behave differently than alternating current (AC) arcs. An AC arc self-extinguishes as the voltage alternates through zero volts 60 times a second; a DC arc burns continuously.
Never use standard household AC light switches or automotive fuses on high-voltage solar DC lines.
- Install dedicated, polarized DC-rated miniature circuit breakers (MCBs) or Class-T catastrophic fuses within 7 inches of your battery bank terminals.
- For DC breaker boxes, use components certified for DC operation. Certain industrial units, such as Square D QO series breakers, carry dual AC/DC ratings (up to 48V DC), making them reliable for low-voltage distribution.
- Use fine-stranded, pure copper welding or marine-grade battery cable (such as UL 1277 or UL 1426) for battery interconnects. Solid-core wire can crack over time due to thermal expansion or structure shifting.
Grounding and Lightning Protection Standards
A safe small house solar setup requires an equipment grounding system and direct-current system bonding:
- Ground Rod: Drive an 8-foot copper-clad steel ground rod into undisturbed soil near the structure.
- Equipment Bonding: Bond every solar panel frame together using specialized stainless-steel grounding clips (such as WEEB clips) and continuous, bare #6 AWG copper wire. Route this grounding conductor directly from the roof racking down to your central grounding busbar and main ground rod.
- Surge Protection: Mount a Type 1 or Type 2 DC surge protective device (SPD) inside your solar combiner box to protect sensitive charge controllers and inverters from lightning-induced voltage spikes.
Financial Breakdown: Costs, Payback Periods, and Incentives
Small home solar systems offer an attractive return on investment because smaller structures have lower overall energy demands.
A modest 1 kW to 3 kW system costs between $3,250 and $9,750 before incentives when professionally installed. If you are handling a straightforward off-grid installation using pre-engineered kits, component costs typically range from $2,550 to $7,000.
Investing in solar slashes small home electric bills by $250 to $750 annually, creating an average payback period of 4 to 9 years. For detailed financial modeling, review our breakdown on installed solar panel prices.
Through the federal Residential Clean Energy Credit, qualifying homeowners can claim a 30% tax credit on solar equipment, battery storage (3 kWh or larger), and installation labor.
| System Specification | Gross Equipment & Labor Cost | 30% Federal Clean Energy Credit | Net Investment Cost |
|---|---|---|---|
| 1.2 kW Array + 5 kWh Lithium Battery | $4,500 | -$1,350 | $3,150 |
| 2.4 kW Array + 10 kWh Lithium Battery | $8,200 | -$2,460 | $5,740 |
| 3.6 kW Turnkey Professional System | $10,800 | -$3,240 | $7,560 |
| 4.8 kW Whole-Home Backup System | $14,500 | -$4,350 | $10,150 |
Frequently Asked Questions About Small House Solar
Can a small solar setup run high-draw appliances like air conditioning or heaters?
Yes, provided the system is engineered with an inverter that handles the startup surge and a battery bank that supports the continuous draw. High-efficiency mini-split heat pumps (rated at 20+ SEER) draw between 500 and 1,200 watts while maintaining comfortable temperatures in compact footprints.
Avoid resistive electric space heaters or electric tank water heaters, which consume 1,500 to 4,500 watts continuously. Pair your solar setup with propane or high-efficiency heat-pump appliances to keep your electrical array reasonably sized.
What is the average lifespan of a compact solar system?
Modern monocrystalline solar panels are exceptionally durable and carry 25- to 30-year linear performance warranties, degrading at a rate of less than 0.5% per year. LiFePO4 lithium batteries typically last 10 to 15 years (3,500 to 6,000 complete cycles). Quality pure sine wave inverters generally last between 10 and 15 years. Over a 25-year lifespan, you should plan to replace your battery bank and inverter unit once.
Do I need a permit to install solar panels on a tiny home or cabin?
Permit requirements depend on the structure type and whether you connect to the utility grid:
- Permanent Foundation Homes: Any small home on a permanent foundation requires standard electrical and building permits through the local municipal or county codes department.
- Grid-Tied Systems: Connecting your solar panels to the municipal electrical grid requires a utility interconnection agreement and electrical inspections.
- Movable Structures (THOWs/RVs): Movable structures classified as recreational vehicles typically do not require municipal building permits for solar arrays mounted directly to the trailer roof, though following NEC Article 551 and NFPA 1192 standards is necessary for safety and insurance coverage.
Conclusion
Sizing a solar power system for a compact home or cabin offers long-term resilience, energy independence, and relief from rising utility rates. By calculating your daily watt-hour consumption, selecting high-efficiency monocrystalline panels, choosing modern 48V LiFePO4 battery storage, and installing code-compliant overcurrent protection, you can build a clean power setup that keeps your lights on through any season.
Whether you are designing a remote mountain cabin in the Smokies or adding rooftop solar to a small home in Knoxville, our team is here to help. Explore our tailored residential solar solutions to start planning your home energy system today.