
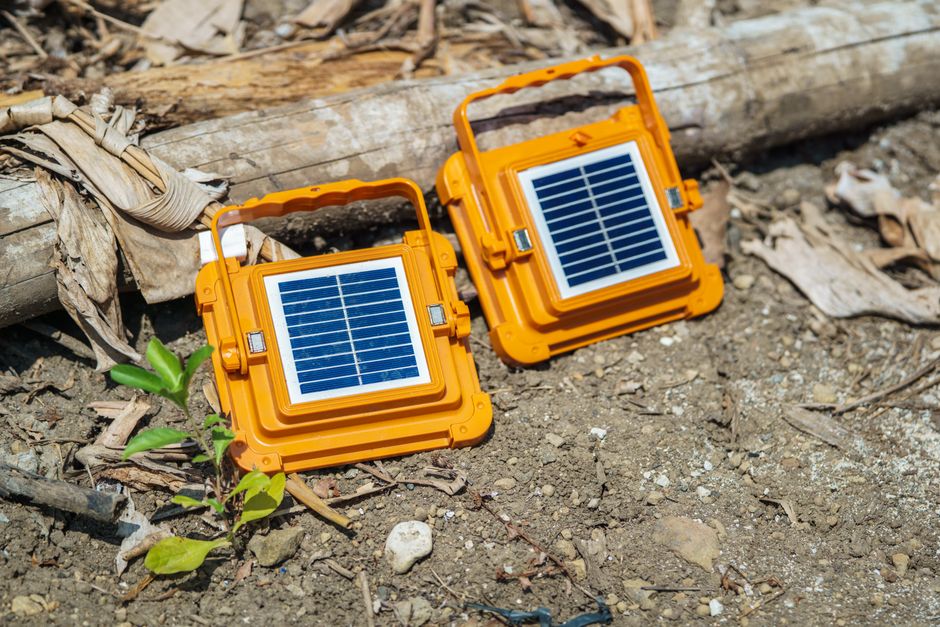
Build a DIY Portable Solar Generator Around What You Need to Power
To build a DIY portable solar generator, start by listing what you want to run and how many hours you need it. Add up those energy needs, then choose a battery with enough usable capacity and solar panels that can replace the power you use. Connect the panels through a charge controller to the battery. Add fused DC outlets or a pure sine wave inverter for household plugs, and mount everything securely in a ventilated case.
This gives you control over the size, ports, and parts you can replace later. It can serve a campsite or keep a few essentials running during an East Tennessee outage, but its limits depend on the loads you choose.
I’m Ernie Bussell, founder of Your Home Solar. My Navy quality assurance training and work leading solar operations shape how I approach a diy portable solar generator: size it for the job, protect every circuit, and test it before relying on it.
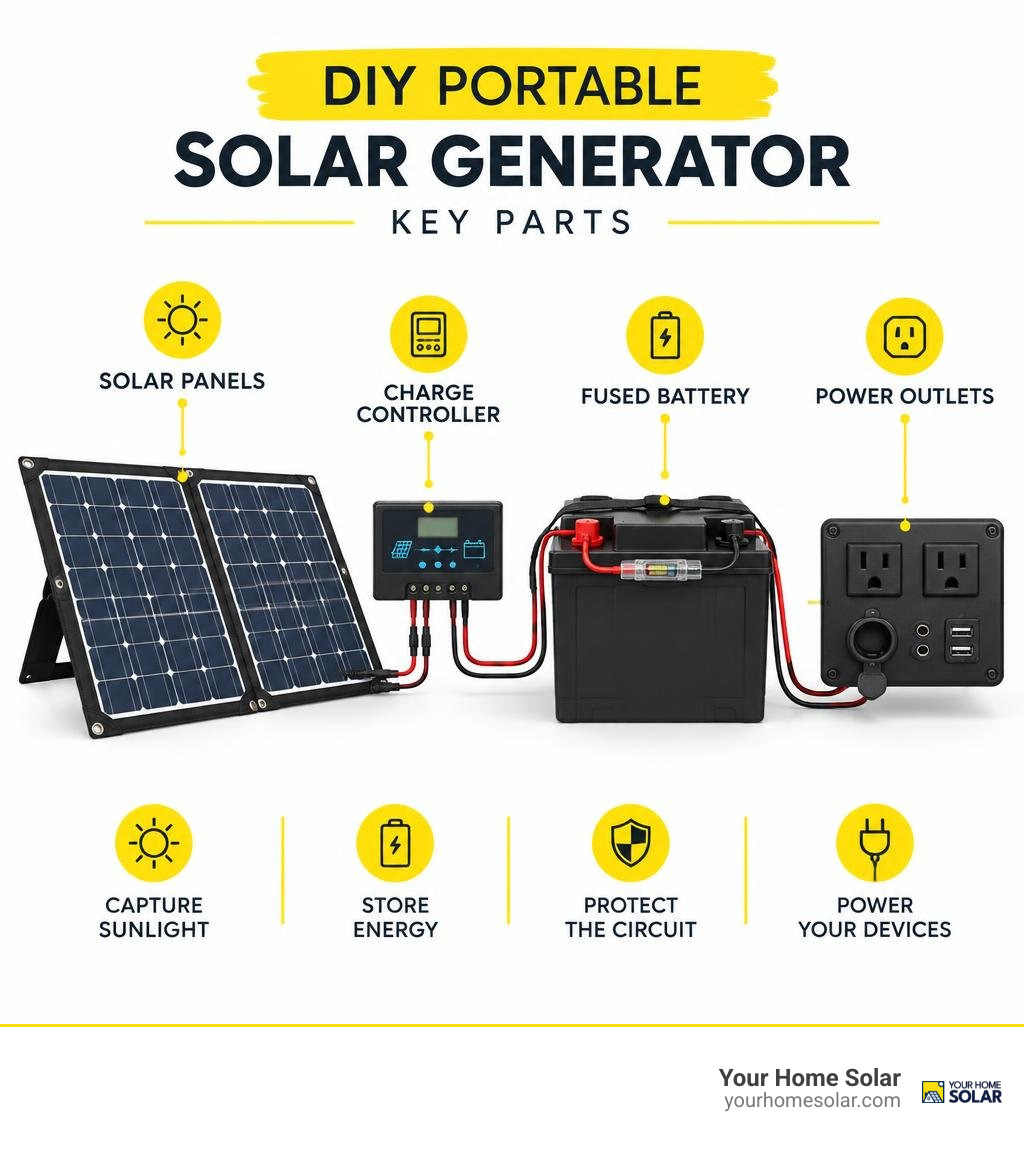
Easy diy portable solar generator word list:
Why Building a DIY Portable Solar Generator Outperforms Commercial Stations
Commercial all-in-one power boxes look sleek on store shelves, but they carry hidden downsides: premium price tags, sealed cases, and non-replaceable parts. Building your own rig cuts upfront costs by 30% to 50% while handing you complete ownership over every wire, fuse, and terminal.
When an internal charging chip fails inside a factory unit, the whole box turns into an expensive doorstop. With a custom setup, every part is accessible. If an inverter or solar regulator fails five years down the road, you can swap that single component in twenty minutes using standard tools.
Building your own station also lets you bypass planned obsolescence and tailor your port layout. If you need dedicated high-amperage 12V Anderson Powerpole plugs for amateur radio gear or extra USB-C fast-charging ports for field laptops, you simply mount them. Pair the rig with quality portable solar panels to create an adaptable off-grid charging setup tailored to your exact energy demands.
| Feature | Custom DIY Solar Rig | Commercial Off-the-Shelf Station |
|---|---|---|
| Initial Cost | $390 – $650 for ~1,280Wh | $900 – $1,300 for ~1,000Wh |
| Component Repairability | 100% modular; replace individual parts | Low; often requires factory replacement |
| Upgrade Flexibility | Expand battery capacity or solar input anytime | Fixed internal battery and solar input limits |
| Port Customization | Built to your exact DC and AC specifications | Fixed factory port layouts |
| Expected Lifespan | 8–10+ years on LiFePO4 cells; 20+ years on panels | 3–7 years (often limited by internal electronics) |
Core Electrical Components and Sizing Calculations
A reliable portable power station relies on four core elements working together: the battery bank, the solar charge controller, the power inverter, and the solar array. Sizing these elements properly prevents drained batteries, inverter shutdowns, and wasted solar harvesting potential.
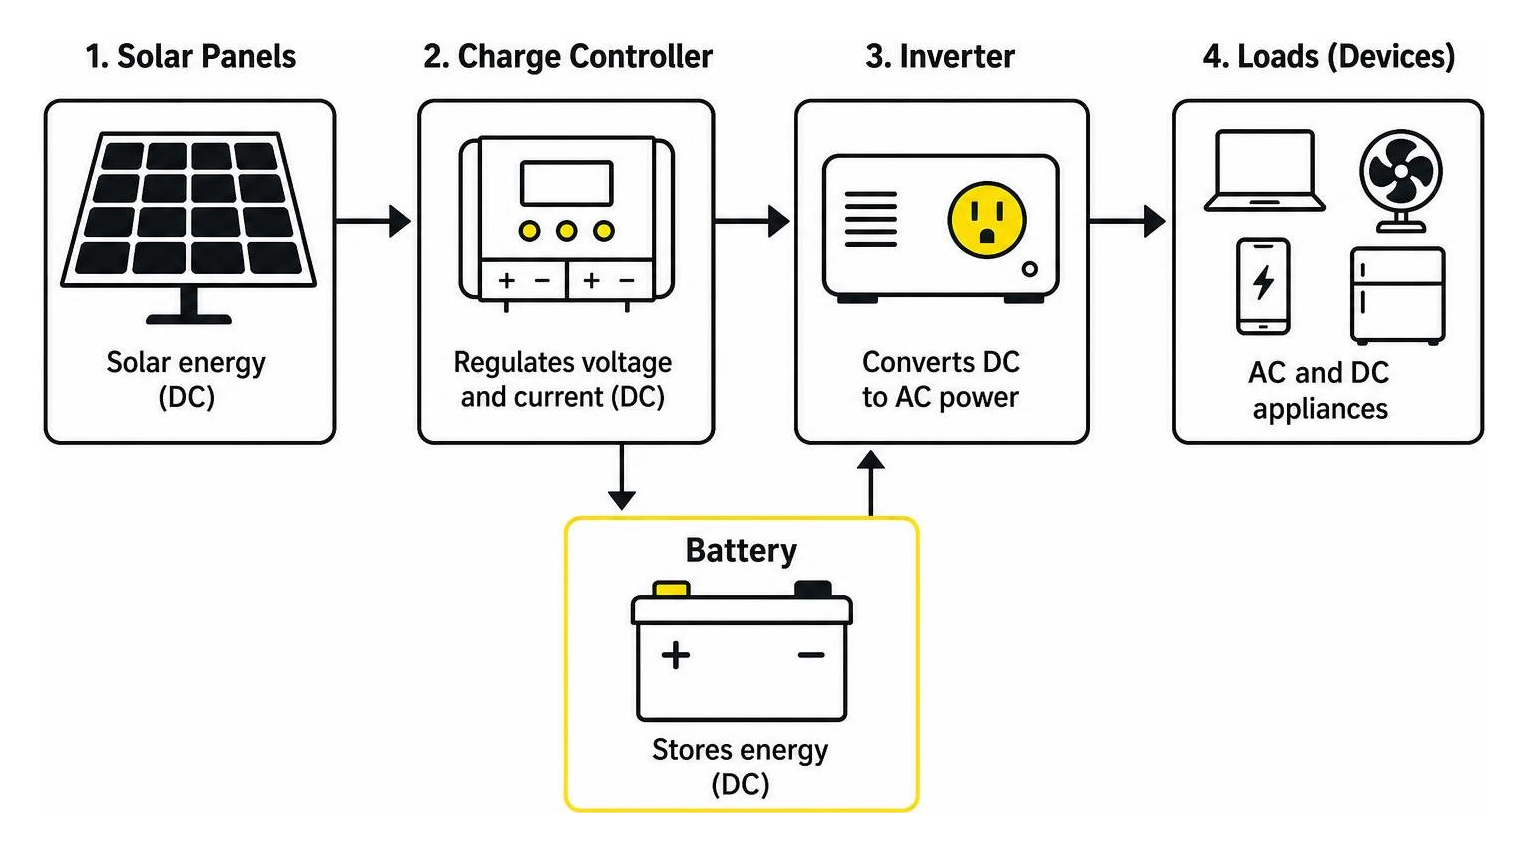
Sizing Your DIY Portable Solar Generator Components
To size your system accurately, calculate your daily energy consumption in watt-hours (Wh). Multiply the running wattage of each appliance by the hours you expect to run it each day:
- Calculate Daily Load: A 45-watt 12V camping fridge running for 12 cumulative compressor hours consumes 540Wh per day. Adding two 15W smartphone recharges (30Wh) and a 60W laptop charger for 2 hours (120Wh) brings your daily total to 690Wh.
- Account for System Losses: Inverters and DC-to-DC converters consume energy through heat and conversion overhead. Multiply your total daily load by 1.2 to build in a safe 20% margin. For a 690Wh load, your target storage capacity is roughly 828Wh.
- Calculate Solar Replenishment: In East Tennessee, average usable peak sun hours range from 3.5 to 5 hours per day depending on the season. Divide your total daily energy requirement (828Wh) by 4 peak sun hours to find your needed solar array wattage: approximately 207 watts. A pair of 100W or a single 250W panel will easily cover this daily demand.
Always follow safe solar power setup practices to ensure every component operates safely within its rated voltage and current limits.
Selecting Batteries, Inverters, and Solar Panels
Battery chemistry dictates how long your rig lasts, how much it weighs, and how deeply you can discharge it without causing damage.
- Lithium Iron Phosphate (LiFePO4): LiFePO4 chemistry is the clear winner for portable solar setups. A 12V 100Ah LiFePO4 battery provides 1,280Wh of energy, weighs roughly 24 to 28 pounds, delivers 4,000 to 6,000 charge cycles, and safely supports an 80% to 100% depth of discharge. Review our deep cycle solar battery guide to explore how different chemistries behave under regular cycling.
- Absorbent Glass Mat (AGM) Lead-Acid: AGM batteries are inexpensive upfront but weigh more than double their lithium equivalents. They degrade rapidly if discharged beyond 50% capacity, giving a 100Ah AGM battery only 600Wh of real-world usable energy.
- Pure Sine Wave vs. Modified Sine Wave Inverters: Always choose a pure sine wave inverter. Modified sine wave units produce electrical distortion that causes motors, medical equipment, and refrigerator compressors to run hot, buzz loudly, or fail prematurely.
- Monocrystalline Solar Panels: Monocrystalline panels deliver superior conversion efficiency in compact footprints compared to polycrystalline options, generating roughly 300 to 500Wh per 100-watt panel across a typical sunny day.
Choosing Between MPPT and PWM Charge Controllers
The charge controller regulates incoming voltage and current from your solar panels to safely charge your battery bank without overcharging.
Pulse Width Modulation (PWM) controllers act as basic electrical switches. They pull the panel’s operating voltage down to match the battery voltage, discarding excess voltage and reducing potential harvest.
Maximum Power Point Tracking (MPPT) controllers track the panel’s optimal voltage and current curves in real time, converting surplus voltage into extra charging amperage. An MPPT controller harvests up to 30% more energy than a PWM unit under cold, overcast, or variable sunlight conditions. Following a detailed guide to building a DIY solar generator helps clarify how pairing MPPT technology with higher-voltage solar arrays unlocks rapid charging speeds.
Essential Tools, Materials, and Step-by-Step Assembly
Building a clean, durable power station requires organized assembly and proper electrical tools to ensure every terminal stays secure during transport.

Required Tools and Enclosure Hardware
Before assembling your rig, gather these basic tools and build materials:
- Enclosure: A heavy-duty, weather-resistant plastic toolbox or rugged wheeled utility case (such as a high-density polyethylene case).
- Internal Mounting Plates: 1/2-inch high-density polyethylene (HDPE) board or marine-grade plywood baseplate.
- Wiring Tools: Heavy-duty hydraulic wire crimper, precision wire strippers, heat gun, and a digital multimeter.
- Electrical Connections: Pure copper fine-strand welding cable (4 AWG to 6 AWG for inverter runs; 10 AWG to 12 AWG for DC circuits), marine-grade dual-wall heat-shrink tubing, heavy copper ring lugs, and Anderson Powerpole connectors.
- Distribution & Protection: Positive and negative copper busbars, a multi-slot ATC/ATO fuse block, and an inline ANL or MRBF terminal fuse.
Step-by-Step Assembly for Your DIY Portable Solar Generator
Follow this sequence to construct your portable power station:
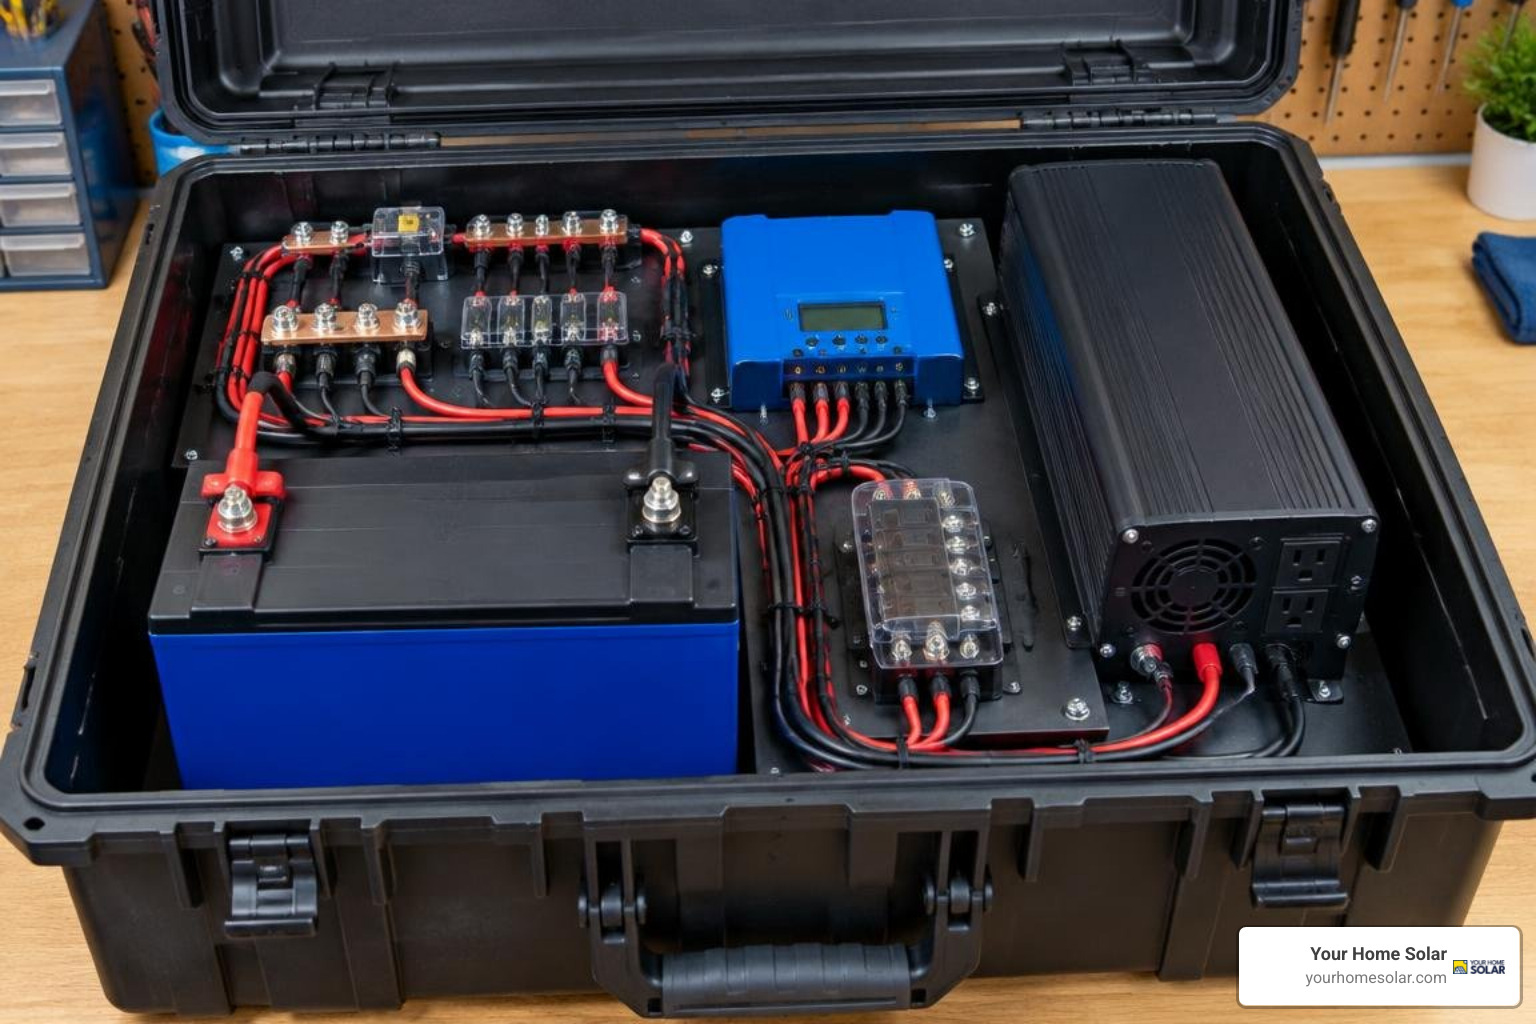
- Prepare Enclosure Cutouts: Mark and cut external openings on your case for your AC inverter outlets, 12V auxiliary sockets, USB ports, cooling vents, and an external solar input socket. Clean all edges and install rubber gaskets around cutouts.
- Mount the Internal Sub-Base: Cut your HDPE or plywood baseplate to fit the bottom of the case. Mounting components to this removable sub-base lets you service or rewire the system outside the tight confines of the box.
- Anchor the Battery: Center the heavy LiFePO4 battery between the case’s structural ribs or wheel wells. Secure it firmly to the baseplate using heavy-duty nylon webbing straps or aluminum corner brackets so it cannot shift during transport.
- Mount the Electrical Gear: Fasten the MPPT charge controller, pure sine wave inverter, common ground busbar, and fused DC distribution block to the mounting plate around the battery.
- Install High-Current Primary Wiring: Run 4 AWG pure copper cable from the battery positive terminal through a master on/off disconnect switch and an appropriately sized inline fuse directly to the pure sine wave inverter. Connect the battery negative terminal to your central negative busbar.
- Wire the DC Distribution & Accessories: Connect your MPPT controller’s battery output terminals to the busbars through a dedicated fuse. Route fused 10 AWG to 14 AWG wiring from the DC fuse block to your external USB ports, 12V cigarette sockets, and LCD battery monitor display.
- Complete Solar Input Ports: Wire your exterior solar connector directly to the solar input terminals on the MPPT controller. To inspect a complete modular assembly, reference this emergency portable lithium generator build guide for layout inspiration.
Critical Safety Protocols, Thermal Management, and Common Mistakes
A high-capacity battery bank stores a massive amount of electrical energy in a compact footprint. Proper circuit protection and thermal management keep your setup operating safely.
- Fuse Every Positive Branch Circuit: Place a main fuse (such as an MRBF terminal fuse mounted right on the battery post) rated for your maximum inverter draw. Never run unfused wires from a battery. If an unfused wire rubs against a bracket and shorts out, it can quickly melt its insulation and cause a fire.
- Avoid Copper-Clad Aluminum (CCA) Wire: Always specify pure oxygen-free copper cabling. CCA wire has higher electrical resistance, creates significant voltage drop, becomes brittle when flexed, and runs much hotter under sustained high loads.
- Install Thermostatic Ventilation: Inverters and charge controllers generate heat under load. Install intake and exhaust vents on opposite sides of your case, paired with a small 12V cooling fan triggered by a thermal switch set to activate if internal case temperatures climb above 105°F.
- Follow the Golden Connection Order: When wiring or powering on your system, always connect the battery to the charge controller before connecting the solar panels. MPPT and PWM controllers rely on battery voltage sensing during boot-up to set their internal charging logic (such as auto-detecting a 12V versus 24V architecture). Connecting panels first can confuse the controller’s logic or permanently damage its input stage.
- Grounding Protocols: Connect your inverter’s equipment chassis ground lug to your central negative busbar using proper gauge wire, ensuring ground fault paths operate as intended when running equipment from 120-volt solar generator systems.
Frequently Asked Questions About Building a Solar Generator
Can a DIY portable solar generator power a full-sized refrigerator during an outage?
Yes, provided you match the inverter’s surge capacity and total battery storage to the appliance’s electrical draw. A modern residential refrigerator draws between 40 and 80 running watts but requires an initial surge of 800 to 1,200 watts for a split second when the compressor starts up.
A 1,000-watt continuous pure sine wave inverter paired with a 12V 100Ah LiFePO4 battery (1,280Wh storage) can easily handle compressor startup surges and run a typical refrigerator for 14 to 24 hours on stored battery power alone. Connecting 200 to 300 watts of external solar panels allows you to keep that refrigerator cycling indefinitely during sunny weather.
How long will a LiFePO4 battery last in a homemade solar power station?
Under regular off-grid use, a quality Lithium Iron Phosphate (LiFePO4) battery lasts between 8 and 12 years. Most top-tier manufacturers rate their cells for 4,000 to 6,000 complete charge and discharge cycles before the pack gradually loses 20% of its original factory capacity.
Because modern LiFePO4 packs incorporate internal Battery Management Systems (BMS) that automatically guard against overcharging, short circuits, deep over-discharge, and high temperatures, they outlast traditional AGM lead-acid batteries by nearly four times.
What is the most critical wiring mistake to avoid during assembly?
The most common and destructive mistake is connecting solar panels to the charge controller before the controller is connected to the battery. Solar charge controllers require stable voltage from the battery bank to power their microprocessors and calibrate internal regulation circuits.
If high, unregulated open-circuit voltage from solar panels hits an uncalibrated controller, the unit can misread system parameters or suffer internal electrical damage. Always connect your battery first, verify that the controller display illuminates with the correct battery voltage, and only then connect your solar array.
Conclusion
Building your own portable solar generator delivers true energy independence at a fraction of the cost of commercial alternatives. By selecting quality LiFePO4 cells, a high-efficiency MPPT charge controller, and a durable pure sine wave inverter, you create a modular, fully repairable power station that will supply clean, reliable energy for over a decade.
Whether you are preparing for seasonal storms across Knox, Blount, and Sevier counties or outfitting a camper for weekend adventures through the foothills of East Tennessee, a custom solar rig gives you absolute confidence in your off-grid power supply. For larger residential setups and permanent backup energy systems, explore our comprehensive off-grid solar panel systems guide to take your home’s energy resilience to the next level.