
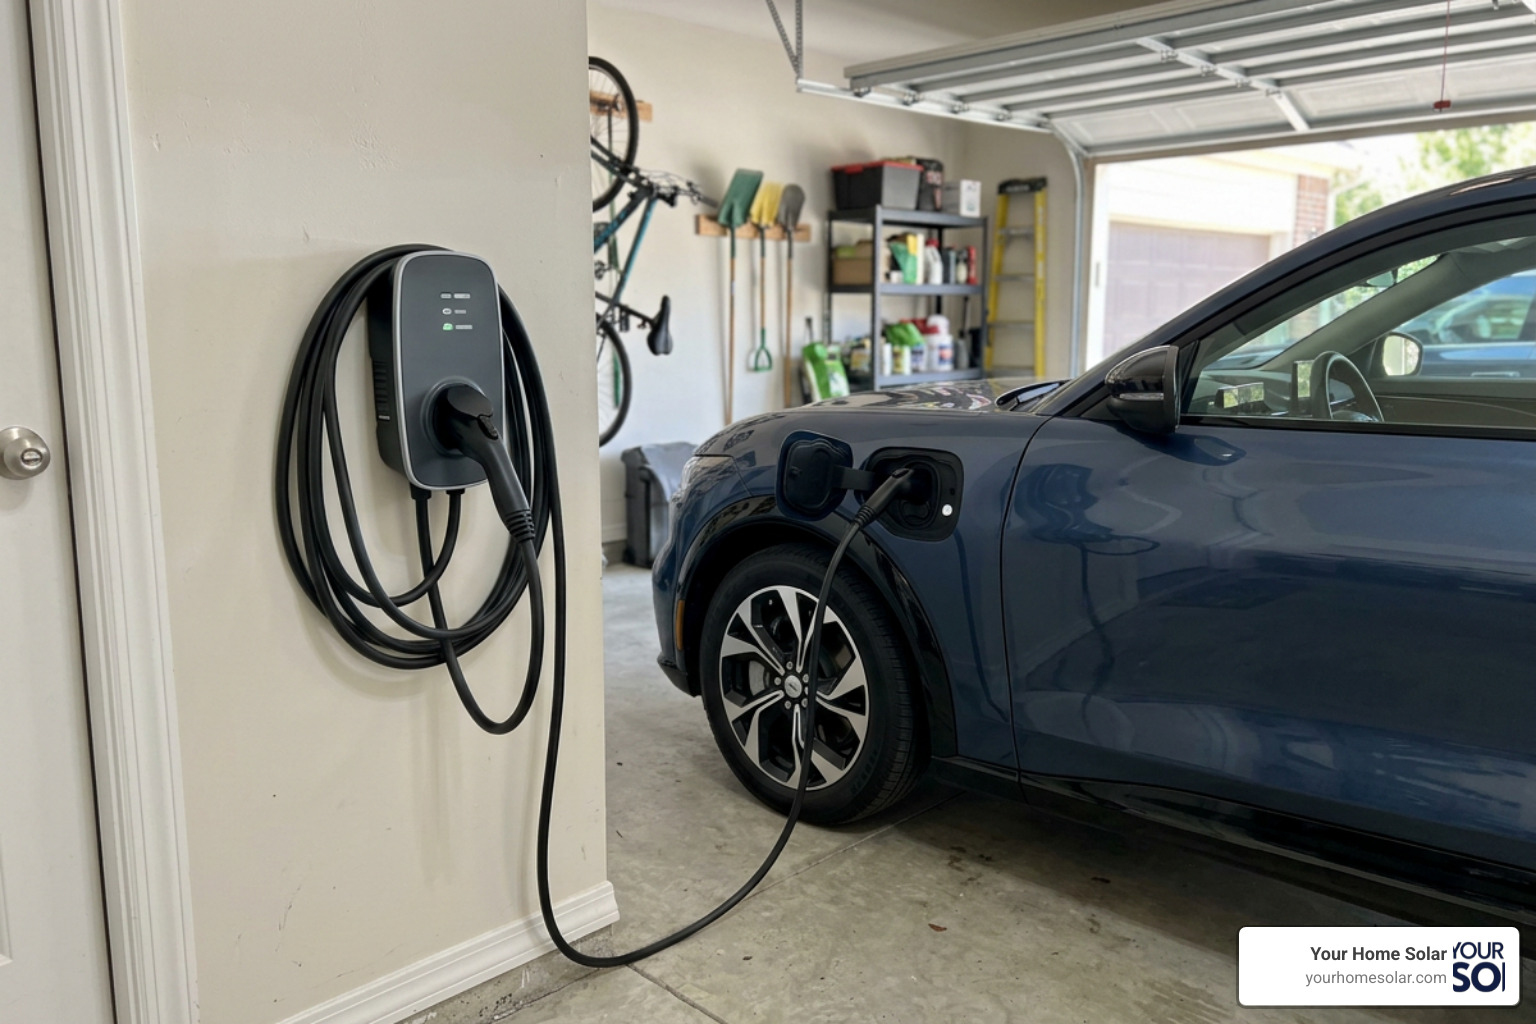
Why a Home Level 2 Charger is a Game Changer
Installing a level 2 charger at home is the single best way to make owning an electric vehicle easy, fast, and stress-free.
Here is a quick summary of what you need to know about home charging:
- The Voltage: It runs on 240-volt power, which is the same type of high-power electrical service your clothes dryer uses.
- The Speed: It adds 25 to 50 miles of driving range per hour of charging, which is up to six times faster than a standard wall outlet.
- The Time: It can fully charge almost any electric car overnight in less than 10 hours.
- The Savings: Charging at home costs roughly one-third of the price of using a public DC fast-charging station.
Many new EV owners start by plugging their cars into a standard 120-volt household wall outlet. However, waiting days for a full charge gets old very quickly, especially during cold winters or when you have a busy schedule.
If you want real energy independence and a vehicle that is always ready to go, upgrading your home setup is the logical next step.
I am Ernie Bussell, founder of Your Home Solar, and my years of experience in Navy nuclear systems and residential energy have helped me master the technical details of home energy setups, including the level 2 charger. In this guide, I will break down exactly how to choose the safest, fastest, and most cost-effective charging station for your Tennessee home.
What is a Level 2 Charger and How Does It Work?
To understand how a level 2 charger operates, we first need to clarify a common industry misconception. The box, cable, and plug you mount on your garage wall is not technically the charger. In the industry, this equipment is called Electric Vehicle Supply Equipment (EVSE).
The EVSE acts as a smart, safe gateway. It delivers high-voltage Alternating Current (AC) power from your home infrastructure to the vehicle. The actual “charger”—known as the Onboard Charger (OBC)—is located inside your car. The OBC takes that AC power and converts it into Direct Current (DC) power so it can be stored in your vehicle’s battery pack.
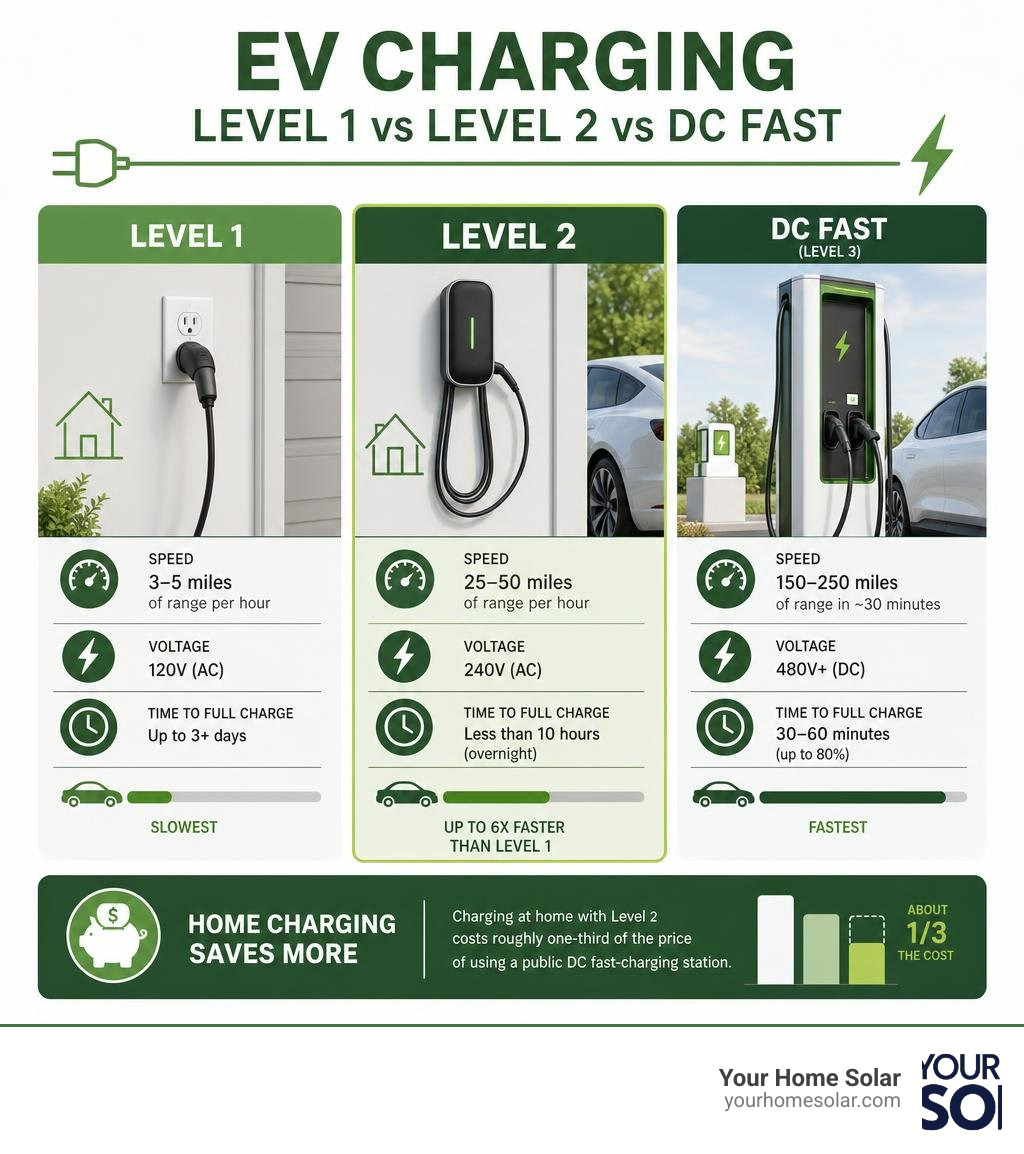
How does this process differ across the three main charging tiers?
- Level 1 Charging: This method uses a standard 120-volt household outlet. It typically outputs about 1 to 1.4 kilowatts (kW) of power. It is incredibly slow, adding only 3 to 5 miles of range per hour. It can take up to several days to fully replenish a large battery.
- Level 2 Charging: Operating on a 240-volt AC circuit, home Level 2 systems deliver between 6 kW and 19.2 kW of power. This setup drastically slashes charging times, easily topping off most vehicles in 4 to 10 hours.
- DC Fast Charging (Level 3): Found at public stations, this method bypasses the car’s onboard converter entirely. It feeds high-voltage DC power (50 kW to 350+ kW) directly into the battery, achieving an 80% charge in as little as 20 to 30 minutes. While convenient for road trips, public fast charging degrades batteries faster over time and is roughly three times more expensive than charging at home.
When evaluating system performance, keep in mind that power transfer is not perfectly efficient. Real-world testing shows that typical charging losses average between 5% and 8% due to heat dissipation and conversion overhead. For a detailed breakdown of these metrics, you can refer to the Level 2 EV Charging Electrical Specifications | National EV Charger Authority.
Key Factors to Consider When Choosing a Charger
Selecting the ideal level 2 charger requires balancing your vehicle’s capabilities, your home’s electrical capacity, and your daily driving habits. We recommend evaluating models based on four primary pillars: charging capacity, hardware durability, user interface, and mounting options.
Amperage and Charging Speed of Your Level 2 Charger
The speed of your charger is directly tied to its amperage. However, you cannot simply buy the highest-amperage model without preparing your electrical panel first.
Under the National Electrical Code (NEC), EV charging is classified as a “continuous load.” This classification means the circuit must be sized to handle 125% of the charger’s actual output. This safety margin prevents wires and breakers from overheating during long, multi-hour charging sessions.
- 32-Amp Charger: Requires a dedicated 40-amp circuit breaker. It delivers roughly 7.7 kW of power, adding 25 to 30 miles of range per hour.
- 40-Amp Charger: Requires a dedicated 50-amp circuit breaker. It delivers approximately 9.6 kW of power, adding 30 to 35 miles of range per hour.
- 48-Amp Charger: Requires a dedicated 60-amp circuit breaker. It delivers up to 11.5 kW of power, adding 40 to 45 miles of range per hour.
- 80-Amp Charger: Requires a dedicated 100-amp circuit breaker. It delivers a massive 19.2 kW of power, though very few passenger EVs have onboard chargers capable of accepting this rate.
| Charger Output (Amps) | Required Breaker Size (Amps) | Power Delivery (kW) | Range Added Per Hour (Miles) | Typical Wire Gauge (Copper) |
|---|---|---|---|---|
| 16 A | 20 A | 3.8 kW | 11 – 13 miles | 12 AWG |
| 32 A | 40 A | 7.7 kW | 25 – 30 miles | 8 AWG |
| 40 A | 50 A | 9.6 kW | 30 – 35 miles | 8 AWG or 6 AWG |
| 48 A | 60 A | 11.5 kW | 40 – 45 miles | 6 AWG |
| 80 A | 100 A | 19.2 kW | 50 – 60 miles | 3 AWG or larger |
Connector Types: J1772 vs. NACS (SAE J3400)
For years, North American electric vehicles used two distinct plug standards for AC charging. Non-Tesla vehicles relied on the J1772 connector, while Tesla utilized its proprietary North American Charging Standard (NACS).
As of 2026, the automotive industry has standardized the NACS design under the official designation SAE J3400. Almost all major automakers are transitioning to native J3400 ports on their new vehicles.
- If you drive an older non-Tesla EV: You likely have a J1772 port. You can install a J1772 charger or use a simple adapter.
- If you drive a Tesla or a newer 2025/2026+ EV: A native NACS charger is your best bet.
- If you want to future-proof your garage: Look for premium options like the Tesla Universal Wall Connector, which features an integrated, auto-locking adapter that seamlessly switches between J1772 and NACS. Alternatively, smart units like the Enphase IQ EV Charger 2 allow you to swap out the physical cable in the future if your charging needs change.
For a broader perspective on global standards, you can read about the European Type 2 connector, which supports three-phase AC power commonly used in industrial and commercial applications.
Plug-In vs. Hardwired Level 2 Charger Installations
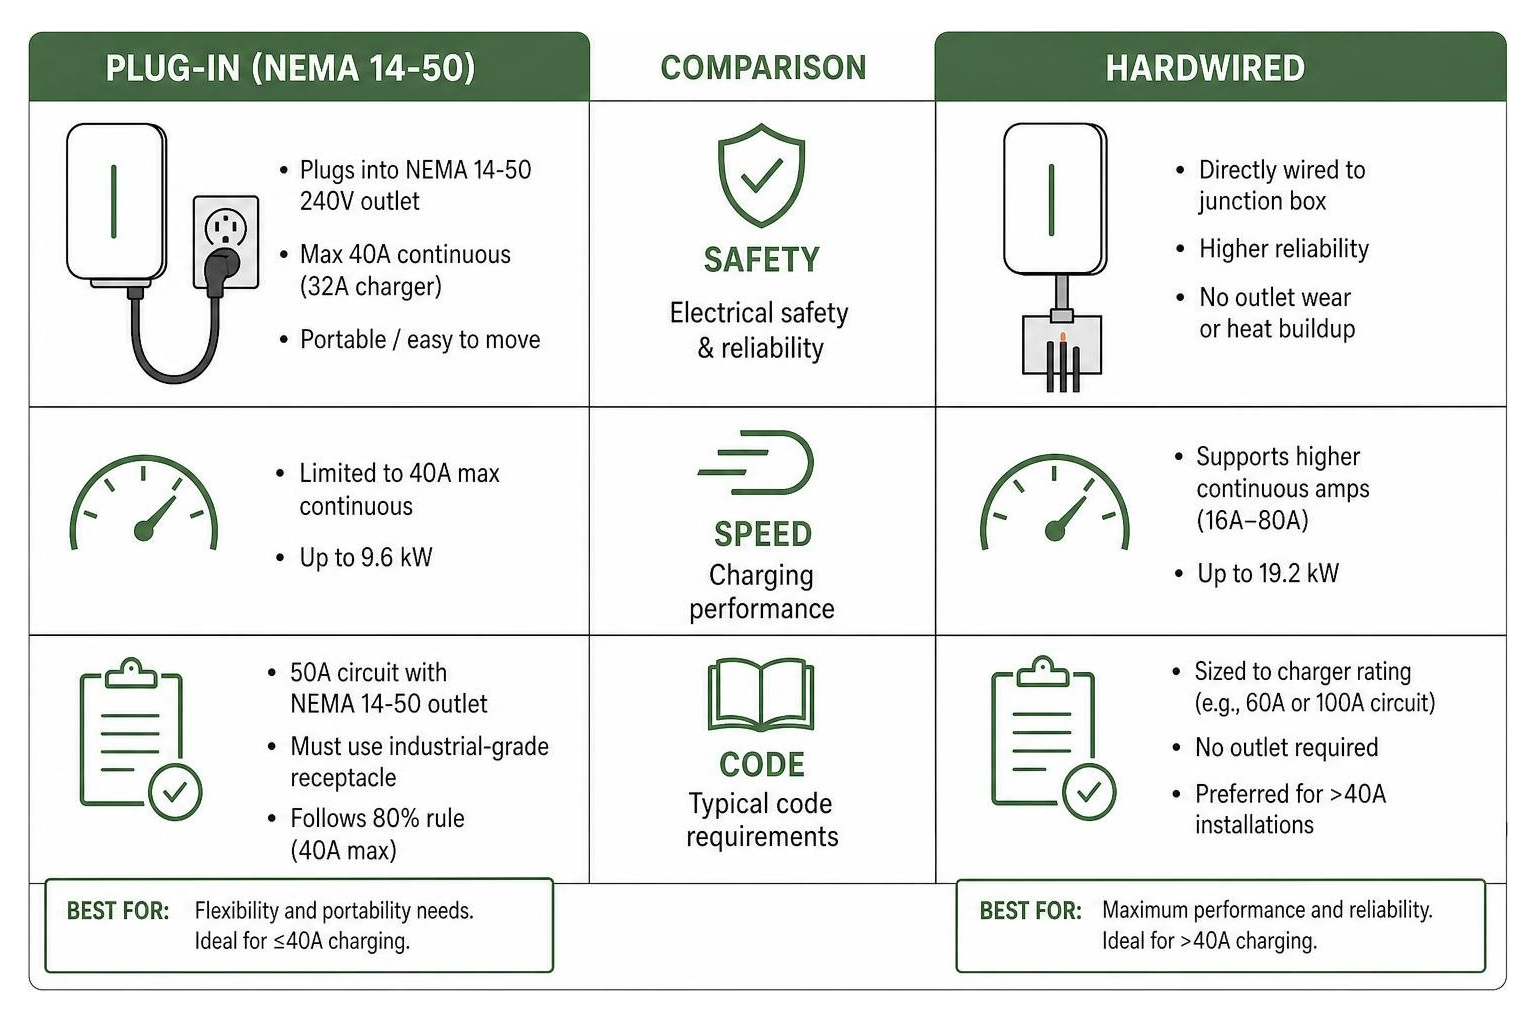
When installing your level 2 charger, you must choose between plugging the unit into a 240V outlet (typically a NEMA 14-50 receptacle) or hardwiring it directly into your home’s electrical junction box.
The Plug-In Option (NEMA 14-50)
This setup allows you to mount the charger on the wall and plug it into a heavy-duty outlet.
- Pros: Highly portable. If you move or need to take the charger to a cabin, you can unplug it and go.
- Cons: Limited to a maximum of 40 amps continuous output (to comply with the 80% safety rule on a 50-amp circuit). Standard residential-grade outlets are not built for the continuous, high-draw load of EV charging; installing a cheap outlet can create a fire hazard. If you choose this route, we highly recommend upgrading to an industrial-grade receptacle (such as Hubbell or Bryant).
The Hardwired Option
This setup connects the charger directly to your electrical panel with permanent wiring.
- Pros: Unlocks maximum speeds of 48 amps or higher (up to 11.5 kW+). It eliminates a major physical failure point (the plug-and-outlet connection) and completely bypasses the need for an external GFCI breaker, saving you from a very common electrical headache.
- Cons: Permanent installation. If you want to move the charger, you will need an electrician to safely disconnect it.
Electrical Requirements and Safety Standards
Adding a level 2 charger to your home is like adding a second central air conditioning unit. It draws a massive, continuous current for hours at a time. Because of this high demand, you must ensure your electrical system is up to the task.
First, evaluate your home’s main electrical panel capacity. A typical older home might have a 100-amp or 150-amp service panel. Adding an 11.5 kW (48-amp) charger can consume nearly half of a 100-amp panel’s entire capacity. If your panel is already crowded with electric water heaters, HVAC units, and hot tubs, you may need a panel upgrade or a smart load-management system.
Safety certifications are non-negotiable. Always look for equipment certified to UL 2594 standards by a Nationally Recognized Testing Laboratory (such as UL or Intertek/ETL). This standard ensures the charger features critical safety mechanisms, including:
- De-energized state control: The plug remains completely unpowered until it is physically locked into your vehicle’s charge port.
- Ground-fault circuit interruption (GFCI): Built-in protection that immediately cuts power if an electrical leak is detected.
- Thermal overload protection: Sensors that throttle back the charging speed if the unit or plug begins to overheat in the summer sun.
If you plan to install your charger outdoors—such as on a driveway or carport—weatherproofing is key. Look for a unit with an IP66 or NEMA 4 rating. These enclosures are dust-tight and completely sealed against heavy rain, sleet, and snow, ensuring safe operation in any East Tennessee weather.
Smart Charging Features and Economic Benefits
Modern level 2 chargers do much more than deliver power; they act as smart energy managers for your home. By connecting your charger to your home Wi-Fi network, you unlock features that save money and reduce grid strain.
- App Scheduling and Time-of-Use (TOU) Rates: Many electric utilities offer discounted rates during “off-peak” hours (usually overnight between 11 PM and 6 AM). With a smart charger, you can plug your car in after work, but schedule the actual charging to begin at midnight. This simple step can slash your charging costs by up to 40%.
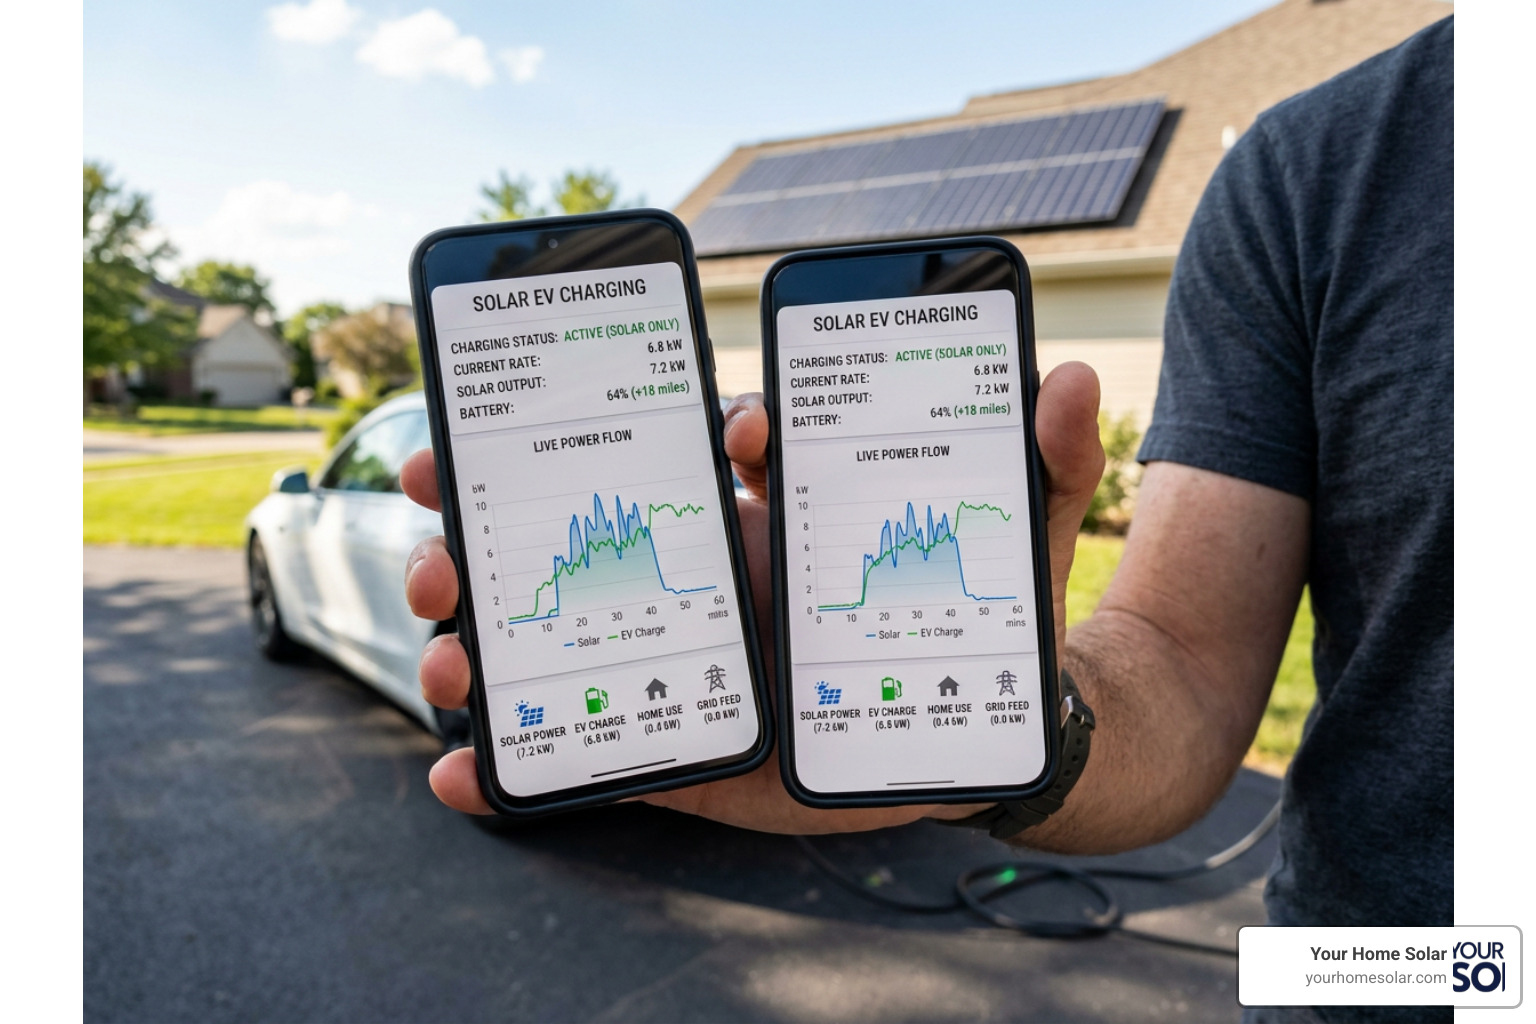
- Solar Integration (Green Charging): If you have a home solar system, smart chargers like the Enphase IQ EV Charger 2 can communicate directly with your solar inverter. In “Green Charging” mode, the charger monitors your solar production in real-time. It can adjust its power delivery in precise 1-amp increments, ensuring your car fuels up exclusively on excess solar energy instead of drawing electricity from the grid.
- Dynamic Load Management: If your electrical panel is close to its limit, some advanced smart chargers can monitor your home’s real-time electricity usage. If you turn on your electric oven and clothes dryer at the same time, the charger will automatically throttle down its speed to prevent tripping your main breaker, saving you from a costly panel upgrade.
Cost of Equipment, Installation, and Incentives
When budgeting for your home EV charging setup, you must account for both hardware and professional installation.
- Equipment Costs: High-quality chargers typically range from $300 to $900. For example, the highly-rated Emporia Classic delivers up to 48 amps of power for $449.00, while specialized dual-vehicle chargers like the Grizzl-E Duo cost around $900.
- Installation Costs: Professional installation by a licensed electrician typically ranges from $749 to $2,500, averaging around $1,700. The exact cost depends on how close your electrical panel is to your parking spot, whether you need to run conduit through walls, and if your panel has space for a new double-pole breaker.
To help offset these upfront costs, several incentives are available:
- Federal Tax Credit: Under the Inflation Reduction Act, homeowners could claim a tax credit of 30% of their total equipment and installation costs (capped at $1,000). While the federal credit expired on June 30, 2026, local utility programs continue to offer excellent support.
- Local Rebates: Many municipal utilities and cooperatives across East Tennessee offer cash-back rebates or special EV charging rate discounts. For example, you can learn more about local sustainability initiatives and public charging infrastructure through the EV Charging – City of Knoxville portal.
Frequently Asked Questions About Home EV Charging
Why does my EV charger keep tripping the GFCI breaker?
This is one of the most common installation headaches, and it is caused by a safety conflict. Modern level 2 chargers have extremely sensitive GFCI protection built directly into the unit.
If you install a plug-in charger, local electrical codes often require you to use a GFCI breaker at the main panel. When you have two GFCI systems monitoring the exact same circuit, they can conflict with each other. This causes “nuisance tripping,” which stops your vehicle from charging.
The easiest way to solve this issue is to hardwire the charger. Because hardwired units do not use an outlet, local codes generally do not require a GFCI breaker at the panel, allowing the charger’s built-in safety systems to protect the circuit without false trips.
Can my home’s electrical panel handle a Level 2 charger without an upgrade?
It depends on your current electrical load. A certified electrician can perform a standard load calculation (per NEC Article 220) to see how much spare capacity you have.
If your panel is near its limit, you do not necessarily have to pay thousands of dollars for a utility service upgrade. You can opt for a smart charger with dynamic load management, or install a smart electrical panel (like SPAN) that automatically balances your home’s power demands in real-time.
How do I calculate the charging time for my specific EV battery?
To estimate your charging time, you need to know three numbers: your vehicle’s battery size (in kWh), your charger’s power delivery (in kW), and the efficiency loss.
Let’s use a standard electric SUV with an 80 kWh battery pack as an example. If you are charging from 10% to 90% (replenishing 64 kWh of energy) using an 11.5 kW (48-amp) charger, you would set up the calculation like this:
$$\text{Time} = \frac{\text{Energy Needed (kWh)}}{\text{Charger Power (kW)} \times \text{Efficiency}}$$
Using a standard charging efficiency of 93% (accounting for a 7% energy loss):
$$\text{Time} = \frac{64}{11.5 \times 0.93} \approx 6 \text{ hours}$$
This means you can easily restore your battery to full health while you sleep.
Conclusion
Upgrading to a level 2 charger is the ultimate way to maximize the convenience and savings of electric vehicle ownership. By selecting the right amperage, choosing between a plug-in and hardwired setup, and utilizing smart charging features, you can ensure your home is fully prepared for the future of transportation.
At Your Home Solar, we specialize in designing and installing comprehensive, tailored home energy solutions across East Tennessee. Whether you are in Knoxville, Oak Ridge, Maryville, Johnson City, Kingsport, Morristown, or Sevierville, our team is committed to providing trusted expertise and ensuring 100% customer satisfaction. We can seamlessly integrate your new EV charger with a custom home solar array and battery backup system, allowing you to fuel your car with clean, free sunshine.
Ready to take control of your home energy? Read The Ultimate Guide to Home EV Charging or contact us today to schedule a professional consultation!